To add Google Analytics tracking to a website, start by signing up for a Google Analytics account if you haven’t already. Once you’re logged in, create a new property for your website and obtain the tracking ID. Next, add the Google Analytics tracking code snippet to the HTML of your website’s pages, preferably just before the closing </head> tag. This snippet includes the tracking ID and JavaScript code that collects data about your website visitors’ interactions. After adding the tracking code, verify its installation using Google Analytics Real-Time reports or browser extensions like Google Tag Assistant. Once verified, you’ll start seeing data about your website’s traffic, user behavior, and more within your Google Analytics account. Remember to comply with privacy regulations and provide users with transparent information about data collection practices on your website.
Google Analytics Tracking Code
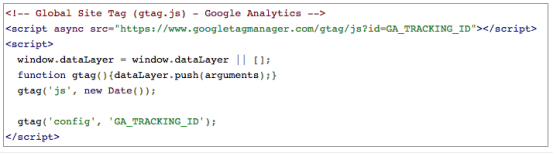
Replace YOURTRACKINGID with your actual Google Analytics tracking ID. You can find this ID in your Google Analytics account under Admin > Property > Tracking Info > Tracking Code. Insert this code snippet into the <head> section of your website’s HTML, ideally just before the closing </head> tag. This allows the Google Analytics tracking code to load and start collecting data about your website visitors’ interactions. Remember to replace YOURTRACKINGID with your actual tracking ID to ensure proper tracking of your website’s traffic and user behavior.
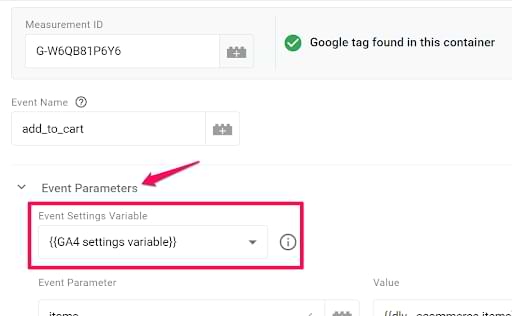
Google Tag Manager
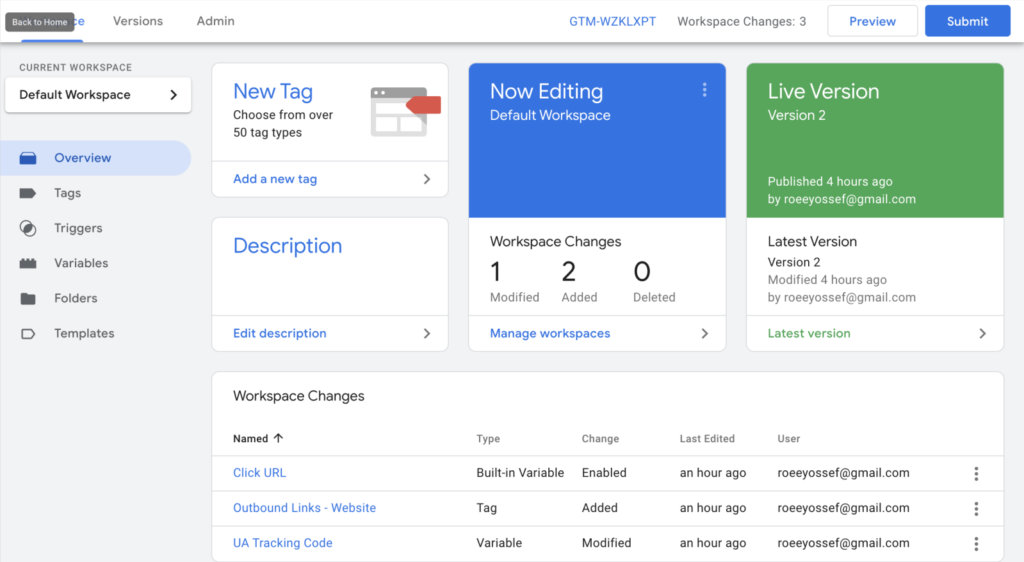
Google Tag Manager (GTM) is a versatile tool designed to simplify the process of managing and deploying various tracking tags and scripts on your website. It provides a centralized platform where you can easily add, edit, and remove tracking codes without directly modifying your website’s source code each time. The core concept of GTM revolves around three key components: tags, triggers, and variables. Tags are snippets of code, such as those for Google Analytics, Facebook Pixel, or custom scripts, that you want to deploy on your website. Triggers determine when these tags should fire, based on user interactions or page conditions, ensuring that tracking occurs at the right moments. Variables store dynamic values that can be reused across tags and triggers, streamlining the setup process. With GTM, you can create and manage these components through a user-friendly interface, making it accessible even to non-technical users. Once configured, GMT’s container snippet is added to your website’s HTML, enabling it to dynamically load and execute the specified tags based on the predefined triggers. Additionally, GTM offers features like version control, debugging tools, and preview mode, allowing you to test and validate your setup before publishing changes to your live website. Overall, Google Tag Manager empowers website owners and marketers to efficiently track and analyze user behavior, optimize marketing campaigns, and enhance website performance, all without the hassle of manual code updates.
How to Add Google Analytics to a Website?
Adding Google Analytics to a website is crucial for understanding your site’s performance and user behavior. To get started, sign up for a Google Analytics account if you haven’t already. Once you’re logged in, create a new property for your website. Google Analytics will generate a unique tracking ID for this property. Next, copy the tracking code snippet provided by Google Analytics. This snippet includes JavaScript code that collects data about your website visitors’ interactions. Paste this code into the HTML of your website, ideally just before the closing </head> tag on each page. This ensures that the tracking code loads early in the page’s life cycle. Once the tracking code is installed, Google Analytics will start collecting data about your website’s traffic, user demographics, behavior, and more. You can then access this data through your Google Analytics account to gain insights into how users are engaging with your site and make informed decisions to optimize its performance. Remember to review and comply with relevant privacy policies and regulations regarding data collection and user consent.
Why We Use Google Analytics?
Google Analytics is an essential tool for website owners and marketers alike, offering invaluable insights into website performance and user behavior. By utilizing Google Analytics, you can track various metrics such as website traffic, user demographics, behavior, and interactions. This data empowers you to understand how users are finding and navigating your site, which pages are most popular, and where visitors are dropping off. Armed with this information, you can make data-driven decisions to optimize your website for better user experience, increase conversions, and achieve your business goals. Moreover, Google Analytics provides detailed reports and customization dashboards, allowing you to monitor key performance indicators over time and identify trends or areas for improvement. Whether you’re running an e-commerce store, a blog, or a corporate website, Google Analytics equips you with the insights needed to measure the effectiveness of your marketing efforts, refine your strategies, and ultimately drive success online.
STEP 1 : Create a Google Analytics Account
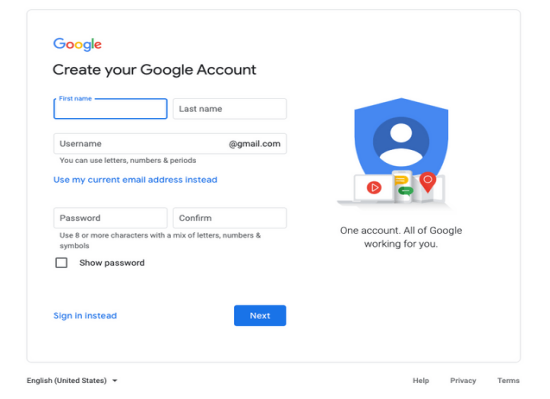
To create a Google Analytics account, begin by visiting the Google Analytics website and signing in with your Google account credentials. If you don’t have a Google account, you’ll need to create one. Once logged in, click on the “Start measuring” button to initiate the setup process. You’ll be prompted to create your first property by providing details about your website or app, including its name, URL, industry category, and reporting time zone. After entering this information, review and accept the terms of service. Upon acceptance, Google Analytics will generate a unique tracking ID for your property. This ID is essential for collecting data from your website or app. You’ll then receive a tracking code snippet that needs to be added to the HTML of all the pages on your website, preferably just before the closing </head> tag. After adding the tracking code, verify its installation to ensure it’s working correctly. You can do this using the Real-Time reports in Google Analytics or browser extensions like Google Tag Assistant. Once verified, Google Analytics will start collecting data about your website visitors’ interactions, enabling you to gain insights into your website’s performance and user behavior.
STEP 2 : Set up a Property in Google Analytics
To set up a property in Google Analytics, start by logging into your Google Analytics account. Once logged in, navigate to the Admin section, typically located in the bottom left corner of the page. In the Admin section, ensure that the correct account and property are selected from the drop down menus. Then, click on the “Create Property” button, which will prompt you to enter details about your website or app, such as the name, URL, industry category, and reporting time zone. Choose the appropriate platform type (web, app, or both) for your property. Optionally, you can configure additional settings such as enabling enhanced measurement or linking your property to a Google Ads account. After entering all the necessary information and configuring any optional settings, save your changes to create the property. Google Analytics will then generate a unique tracking ID for your property, which you’ll need to implement on your website or app to start tracking data. This tracking ID is crucial for collecting data about your website visitors’ interactions and behavior.
STEP 3 : Filter the Data You See in Google Analytics
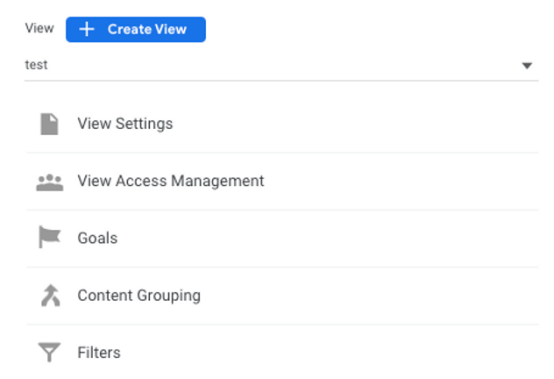
In Google Analytics, filtering data allows you to focus on specific subsets of your website or app traffic, providing more targeted insights. To filter the data you see, navigate to the Reporting tab after logging into your Google Analytics account. Here, you’ll find various reports detailing your website or app’s performance. To apply filters, click on the “Add Segment” button above the report. Segments allow you to isolate and analyze specific groups of users or sessions based on predefined criteria. You can choose from a variety of default segments provided by Google Analytics, such as “Organic Traffic” or “Mobile Traffic,” or create custom segments tailored to your needs. Custom segments enable you to filter data based on specific dimensions and metrics, such as geographic location, device type, or user behavior. Once you’ve selected the desired segment or created a custom one, click “Apply” to apply the filter to your report. This will narrow down the data displayed in the report to only include the sessions or users that match the selected criteria. Filtering data in Google Analytics allows you to gain deeper insights into your audience, behavior patterns, and performance metrics, enabling you to make more informed decisions to optimize your website or app.
STEP 4 : Get Your Google Analytics Tracking Code
To obtain your Google Analytics tracking code, you first need to sign in to your Google Analytics account. Once logged in, navigate to the Admin section, typically located in the bottom left corner of the page. In the Admin section, ensure that the correct account and property are selected from the drop down menus. Then, click on “Tracking Info” under the Property column and select “Tracking Code.” Here, you’ll find your tracking ID, which is a unique identifier for your property, and the tracking code snippet that you need to add to your website’s HTML. The tracking code snippet typically includes a JavaScript code snippet that collects data about your website visitors’ interactions. Copy the entire tracking code snippet provided by Google Analytics. This code snippet needs to be added to all the pages of your website, ideally just before the closing </head> tag. Paste the tracking code into your website’s HTML, and ensure that it is implemented correctly across all pages. Once the tracking code is installed, Google Analytics will start collecting data about your website visitors’ behavior, enabling you to analyze traffic, user engagement, and other valuable insights to optimize your website’s performance.
STEP 5 : Add the Tracking Code to Your Website
To add the Google Analytics tracking code to your website, you first need to obtain the tracking code snippet from your Google Analytics account. After logging into your Google Analytics account, navigate to the Admin section, typically located in the bottom left corner of the page. In the Admin section, ensure that the correct account and property are selected from the drop down menus. Then, click on “Tracking Info” under the Property column and select “Tracking Code.” Here, you’ll find the tracking code snippet that includes a JavaScript code segment. This code collects data about your website visitors’ interactions. Copy the entire tracking code snippet provided by Google Analytics. Next, you’ll need to paste this tracking code snippet into the HTML of your website. It’s best to add the tracking code snippet just before the closing </head> tag on each page of your website. This ensures that the tracking code loads early in the page’s life cycle, allowing Google Analytics to start collecting data as soon as possible. Once you’ve added the tracking code snippet to your website’s HTML, save the changes and ensure that the tracking code is implemented correctly across all pages. After adding the tracking code to your website, you can verify its installation using the Real-Time reports in Google Analytics or browser extensions like Google Tag Assistant. Once verified, Google Analytics will start collecting data about your website visitors’ interactions, enabling you to gain valuable insights into your website’s performance and user behavior.
STEP 6 : Verify the Tracking Code
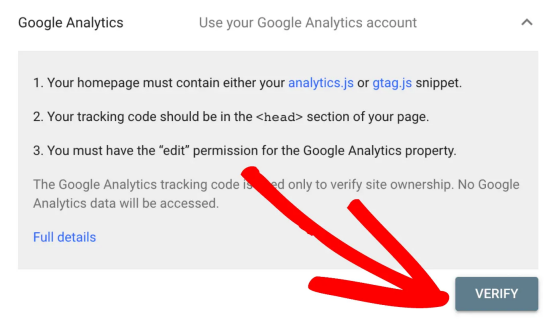
To verify the tracking code installation on your website, you can use various methods provided by Google Analytics. One common method is to use the Real-Time reports feature, which allows you to see live data about the activities happening on your site in real-time. After adding the tracking code to your website’s HTML, navigate to your Google Analytics account and select the Real-Time reports. Here, you can monitor the number of active users on your site, the pages they’re currently viewing, and the traffic sources bringing them to your site. Another method is to use browser extensions like Google Tag Assistant. This extension helps you validate that Google Analytics tracking code is correctly implemented on your website by checking for any issues or errors. Simply install the extension in your browser, navigate to your website, and then click on the extension icon. Google Tag Assistant will analyze your site’s code and provide feedback on the status of your Google Analytics tracking implementation. By verifying the tracking code installation using these methods, you can ensure that Google Analytics is properly collecting data about your website visitors’ interactions. This validation process is crucial for ensuring the accuracy and reliability of the data you’ll be analyzing in your Google Analytics reports.
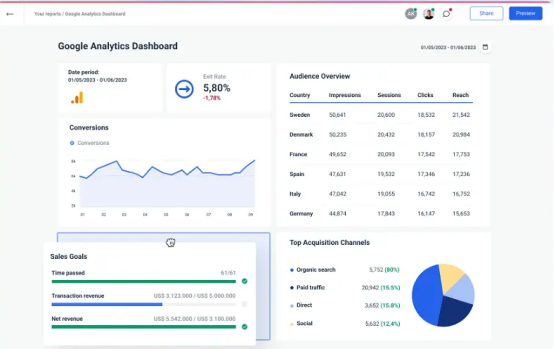
STEP 7 : Understand Basic Google Analytics Reports
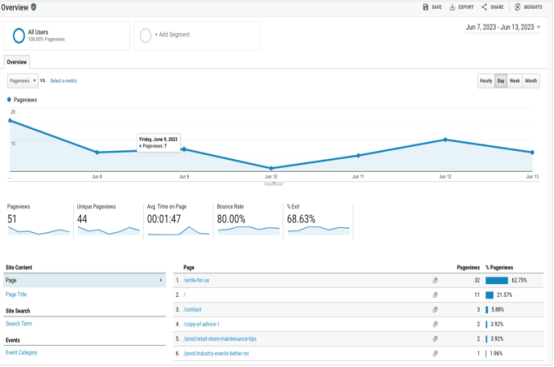
Google Analytics offers a variety of reports to help you understand how users are interacting with your website. One fundamental report is the Audience Overview report, which provides insights into your website’s traffic, including metrics like the number of sessions, users, page views, and average session duration. This report also includes demographic information such as the geographical location of your users and their devices and browsers. The Acquisition Overview report focuses on how users are finding your website, detailing traffic sources such as organic search, direct traffic, referral traffic, and paid search. It also provides data on user behavior from different marketing channels. The Behavior Overview report offers insights into how users navigate your website, showing metrics like the most popular pages, site content, and events. It helps you understand which pages users visit most frequently and how they engage with your content. Additionally, the Conversion Overview report tracks the completion of specific goals or actions on your website, such as purchases or form submissions. By analyzing these reports, you can gain valuable insights into your website’s performance, user behavior, and marketing effectiveness, enabling you to make informed decisions to optimize your website and achieve your business objectives.